Showing posts with label Civilians. Show all posts

Monday, December 23, 2019

LPL - Final Entries

With the year winding up, I'm going to include my final Lead Painters League entries in a single post.  Rounds 8, 9 and 10 saw me at the bottom of the pack, which was unsurprising.  Overall, I finished in last place, but I'm actually pretty happy with that.  Score-wise, I kept up with the competition, staying within 10 points of my closest competitor.  More importantly, I was able to get a lot more painted than I usually do, and proved to myself that I can make the time to paint if I put some effort into it.

Entry 8 - Rural Residents
My eighth entry to the contest was another set of Perry miniatures.  Most were civilian, but I believe one of the men on the right came from an infantry pack.  Overall I was pretty happy with how these turned out.  The field worker figure was my first time painting dark skin, and I wasn't sure how it would read, but it turned out okay.  Also for this round, I built a bit of background scenery, which I'll cover in a later post.

Entry 9 - Sharpshooter's Revenge
For the ninth round of the League, I assembled some figures from a few different packs of Perry Miniatures.  The man lying face down on the ground is from their plastic British Infantry set.  The man on horseback came from a pack of generals of some sort.  The two infantry men on the left started out as figures from an artillery set.  I carved off their artillery accessories, removed their right arms, and added muskets and arms from a British Infantry plastic sprue.  The crouching figure is not from Perry.  He was found in a box of random stuff I found in a drawer, and may have come from Wargames Foundry originally.

With this group, I'm happy with the poses and the overall scene, but I wasn't happy with the painting.  I rushed a bit, and the metal figures had been painted before, so some stripping and repainting was required.  I'm tempted to strip the paint from these again and make another attempt.

Entry 10 - 2nd New Hampshire Command
My final entry to the competition was a command stand that I painted up in the uniform of the 2nd New Hampshire Continentals.  I don't recall where these particular sculpts are from, but I believe they were intended to be militia originally.  After a short bit of research, I decided that I like the sky-blue faced red regimental coats and buff colored flag of the 2nd, so I went with that.

Finally, here are a few shots of the entire collection of miniatures that I painted for this year's Lead Painter's League.  Fifty figures was the requirement for the overall competition, and I managed to paint up 56.  I'm very happy with my overall output, and I like that I've painted up enough AWI sculpts that I can start to seriously look into hosting some small skirmish level games.

Lead Painters League 2019 - Overhead

Lead Painters League - Assembled Forces


Tuesday, December 3, 2019

Camp Life

Life in Camp
Round 5 of the Lead Painter's League brought me my first win of the competition.  The figures are from Perry Miniatures, and have tons of character.  This is a set that I've wanted to paint for a long time.  Years, in fact.  It's just a scene that seems so familiar.  When I showed the finished work to my daughter, I discovered why.

"That looks like our reenacting group," she said, "That's me braiding your hair, Gerry telling a story, Dave with his drink, and Chrissey cooking over the fire."

Completely unintended, but she's right.  I think I like this scene so much because it feels like home.

Also Life in Camp...

Sunday, October 13, 2019

Colonial Townsfolk

Perry Miniatures Civilians
The second round of the Lead Painter's League has ended.  My entry, a group of civilians from Perry Miniatures was paired up against some fantasy type figures.  My opponent won the round, dropping me from 19th to 21st place overall, but I'm still really happy with these figures.


I'm especially happy with how the well-dressed lady turned out.  I struggled a bit with what color to make her petticoat, but the shading on her overall gown came out well.  I need to practice shading some more, but this one felt nice to paint. 


The Benjamin Franklin looking gentleman I'm also happy with, though there are some improvements I would have made had I had more time to work.  I dabbed his face a bit at the end, and the slight blue highlight on his hat turned out lighter than I would of liked.  His base also needs some touch up, as some of the basing materiel came off as I was photographing.


The lady with the basket I tried to make a little more dirty and run down.  The biggest struggle was painting the baby on her back.  I don't know if it was the sculpt, or my painting, but he still sort of looks more gremlin-like and baby-like.


The fellow carrying the barrel suffers from the same basing and highlighting problem as the Franklin fig, but I was happy how his breeches turned out.  I tried highlighting with a darker color as opposed to using a wash on this one.


Finally there's the broom woman.  I'm not happy with her face, but her jacket, especially the back, turned out well.

On to Round 3 this week!

Thursday, September 19, 2019

Populating Fort #4

18th Century me with a couple of my daughters.

As I mentioned in my last post, on August 24th and 25th, Warner's Regiment was invited to take on the role of citizens living within the Fort at #4 in Charlestown, New Hampshire.  As a military unit, most of our events are focused on battles, but this event was focused on the people.

The fort itself is an neat structure, or rather, gathering of structures.  There are several houses and shops, arranged in a square around an open green.  The entirety is then encircled by a palisade of logs.  The fort also has a couple of out-buildings, including a working blacksmith shop.

This time around, G and I focused our energy on baking bread for the Regiment's annual dinner, which was going to be taking place at the fort Saturday night.  I researched a few period recipes, we tried a couple at home, and settled on the one that we liked the best.  The night before, we mixed up several batches of dough, leaving them to rise so they'd be ready for baking the next day.

The morning of the event, my child-care plans changed, so we ended up running late, and bringing three more children than planned with us.  It was pretty awesome hanging out with my daughters in period attire, in a period setting, surrounded by friends with their kids and families.

I didn't catch  photos of what everyone in the unit was up to, but in addition to a few of us manning the bake oven, we had a leather worker, a gunsmith, a tinsmith, a couple of spinners, as well as the usual museum staff.  Some of the kids made butter, which was an great addition to the fresh baked bread, and it was overall a nice relaxing day.

Sgt. Golden started the fire since we were running late.

Adding some dough to the oven.

A couple of loaves, fresh from the oven.

Posing with my wares in the Fort's tavern.

There's a baby playing in the middle of that awesome circle of protection.

My youngest, enjoying the fort.

Miss Gabriella, probably *not* laughing at a dad joke.

Me and my wild child.


Wednesday, September 11, 2019

Workman's Apron

Bread anyone?
The Challenge: September: Everyday (Common workman's apron)
Material:
Cotton Muslin
Pattern: Based on diagram on page 6 of The Packet II by Mark Tully
Year:
18the Century
Notions: None
How historically accurate is it? Very accurate, based on period sketches and paintings
Hours to complete:
Around 8.
First worn: August 24, 2019.
Total cost: About $5.

At the end of August, my daughter and I were going to be participating in an event with a civilian focus at Fort #4 in Charlestown, New Hampshire.  Since the venue has an outdoor bake oven, my daughter asked if we could bake bread as we had done there a few years ago.  A few days before the event, I got it into my head that if I was going to be a baker, I should have an apron.  I checked some period sketches and paintings, and saw numerous bib-type aprons with a button hole sewn into the top to hook over the button on a mens waistcoat.  These aprons seemed to be used by numerous trades, including carpenters, smiths, and shopkeepers.  I had some muslin left from G's dress project, so I cut out the shape, based on the diagram shown in Mark Tully's The Packet series, and spent a couple of days hand sewing the outer seams all around, adding a button hole, and attaching long apron strings.  I finished in time to wear the apron to the event, putting me a bit closer to feeling like an actual baker.  My workmans cap, that I've carried in my pack for a few years, went missing, so I had to bake in my cocked hat, which tipped the balance back toward *not* feeling like an actual baker.

As it happened, the September Historical Sew Monthly challenge is "Everyday" where participants are challenged to make an item of clothing that would be used in a normal everyday sort of environment.  No fancy dresses or polished suits, just normal stuff the average person might wear during their day to day life.  So, though it was both started and finished a week before September, here's my September contribution to the challenge.

Friday, July 12, 2019

Girl's 1770s Dress

Settler or Princess?
The Challenge: April: Upping Your Game (Women's Clothing & Pleats)
Material:
Cotton flannel, with Osnaburg lining, cotton thread
Pattern: Larkin & Smith "18th Century Girl's Gown"
Year: 1750s to 1770s
Notions: Twill tape, eye hook
How historically accurate is it? Pattern and construction are accurate.  Color is accurate.  I'm not sure if cotton flannel was available in New England at the time period.
Hours to complete:
40 to 50
First worn: July 9, 2019. First public outing will be August 3 at Old Sturbridge Village.
Total cost: About $10. The fabric was reclaimed from an old bed sheet.


Since I started late, I'd like to catch up on the first six months of The Historical Sew Monthly Challenge.  Gabriella has been needing a new dress for events for some time, and I was determined to make her something for Hubbardton.  I missed the deadline by a couple of days, but the majority of this piece was finished in about one week, with some details and hemming that I finished up in the last couple of days.  The dress fit nicely with one of the HSM Challenges.  The Challenge for April was "Upping Your Game," or doing something that you're not great at, in an effort to become better at it.  Since I've mostly done men's clothes in the past, and since my pleating is generally horrific, this dress hit two of my weak points.
Pleats!  So many pleats!
The pattern is from Larkin & Smith, and is based upon their research into a circa 1750-1770 girl's dress from a private collection.  I followed the hand-sewing instructions to make it as historically correct as possible, given that I was sewing it out of a bed sheet.  Flannel is period correct, but I'm not sure if cotton flannel is, so that may be the only bit not accurate.  I can say that the Larkin & Smith pattern and instructions are excellent, and were easy for me to follow.


Yay! Pocket slits!
Like the cloak that I made for her earlier, the important thing is that my customer is happy.  She's not used to the tight fit, which is period, but she's extremely happy that it has pocket slits.  So happy, in fact, that she spent the next couple of days after these photos hand-sewing a pocket for herself, based on the one pictured in "Costume Close Up."

Overall, I'm very happy with how this turned out.  Construction photos below.


Larkin & Smith pattern and instructions - Highly recommended!
Tracings of the correct size pattern pieces.
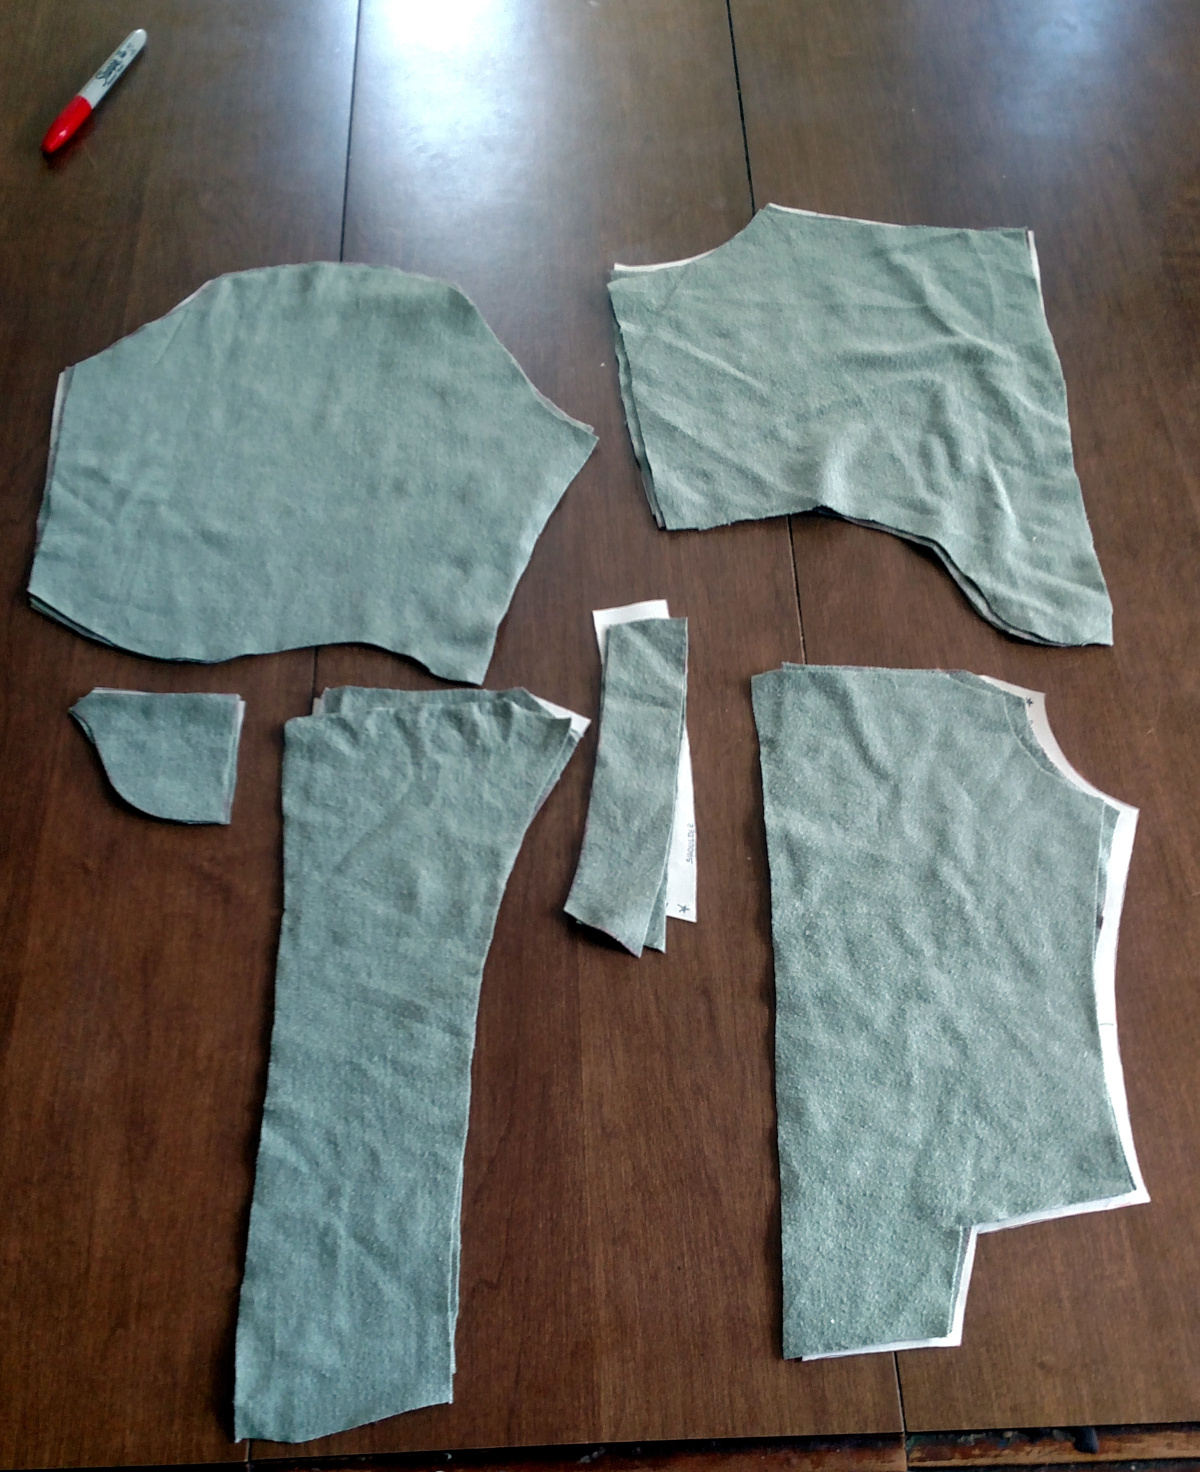
Pattern pieces cut out.
Bodice fabric and lining pieces cut.
Pinning the pieces
Bodice front and back pinned.
First fitting. A bit tight.
First fitting. Goofy face is apparently mandatory.
Hand sewn eyelets in each bodice back piece.
Bodice back finished with plackets.
Placket opened to show eyelets.
Bodice lining finished.
Finished bodice interior.
Finished bodice front.
Finished bodice back.
Pleats.  I'm pretty happy with these.
Finished dress, minus hemming and skirt hook.
Finished back, minus skirt hook and eye.
Bodice back is spiral laced.