Showing posts with label Buildings. Show all posts

Wednesday, June 14, 2023

Colonial Blockhouse

Stillwater Blockhouse Plan

 Last October, I decided to take part in the Little Wars TV Discord "Secret Soldier."  Basically, this was the group's version of a traditional Secret Santa swap, where wargamers picked names and traded gifts with each other.  I don't remember the exact parameters, but the idea was to keep the cost low, and buy/build something that your recipient would like.

28mm Colonial Blockhouse

For my gift, I decided to build a colonial blockhouse, such that may be found in New England during the French & Indian War or American Revolution.  I'd been wanting to build one anyway, being fascinated with the Battle of Shelburne Blockhouse, so I had much of the material on hand.

Early in November, I had a day to myself, so I traveled over to the Saratoga, NY area to visit the Stillwater Blockhouse, a replica that resembles what I've always pictured the Shelburne building to look like.

Stillwater Blockhouse on the Hudson River

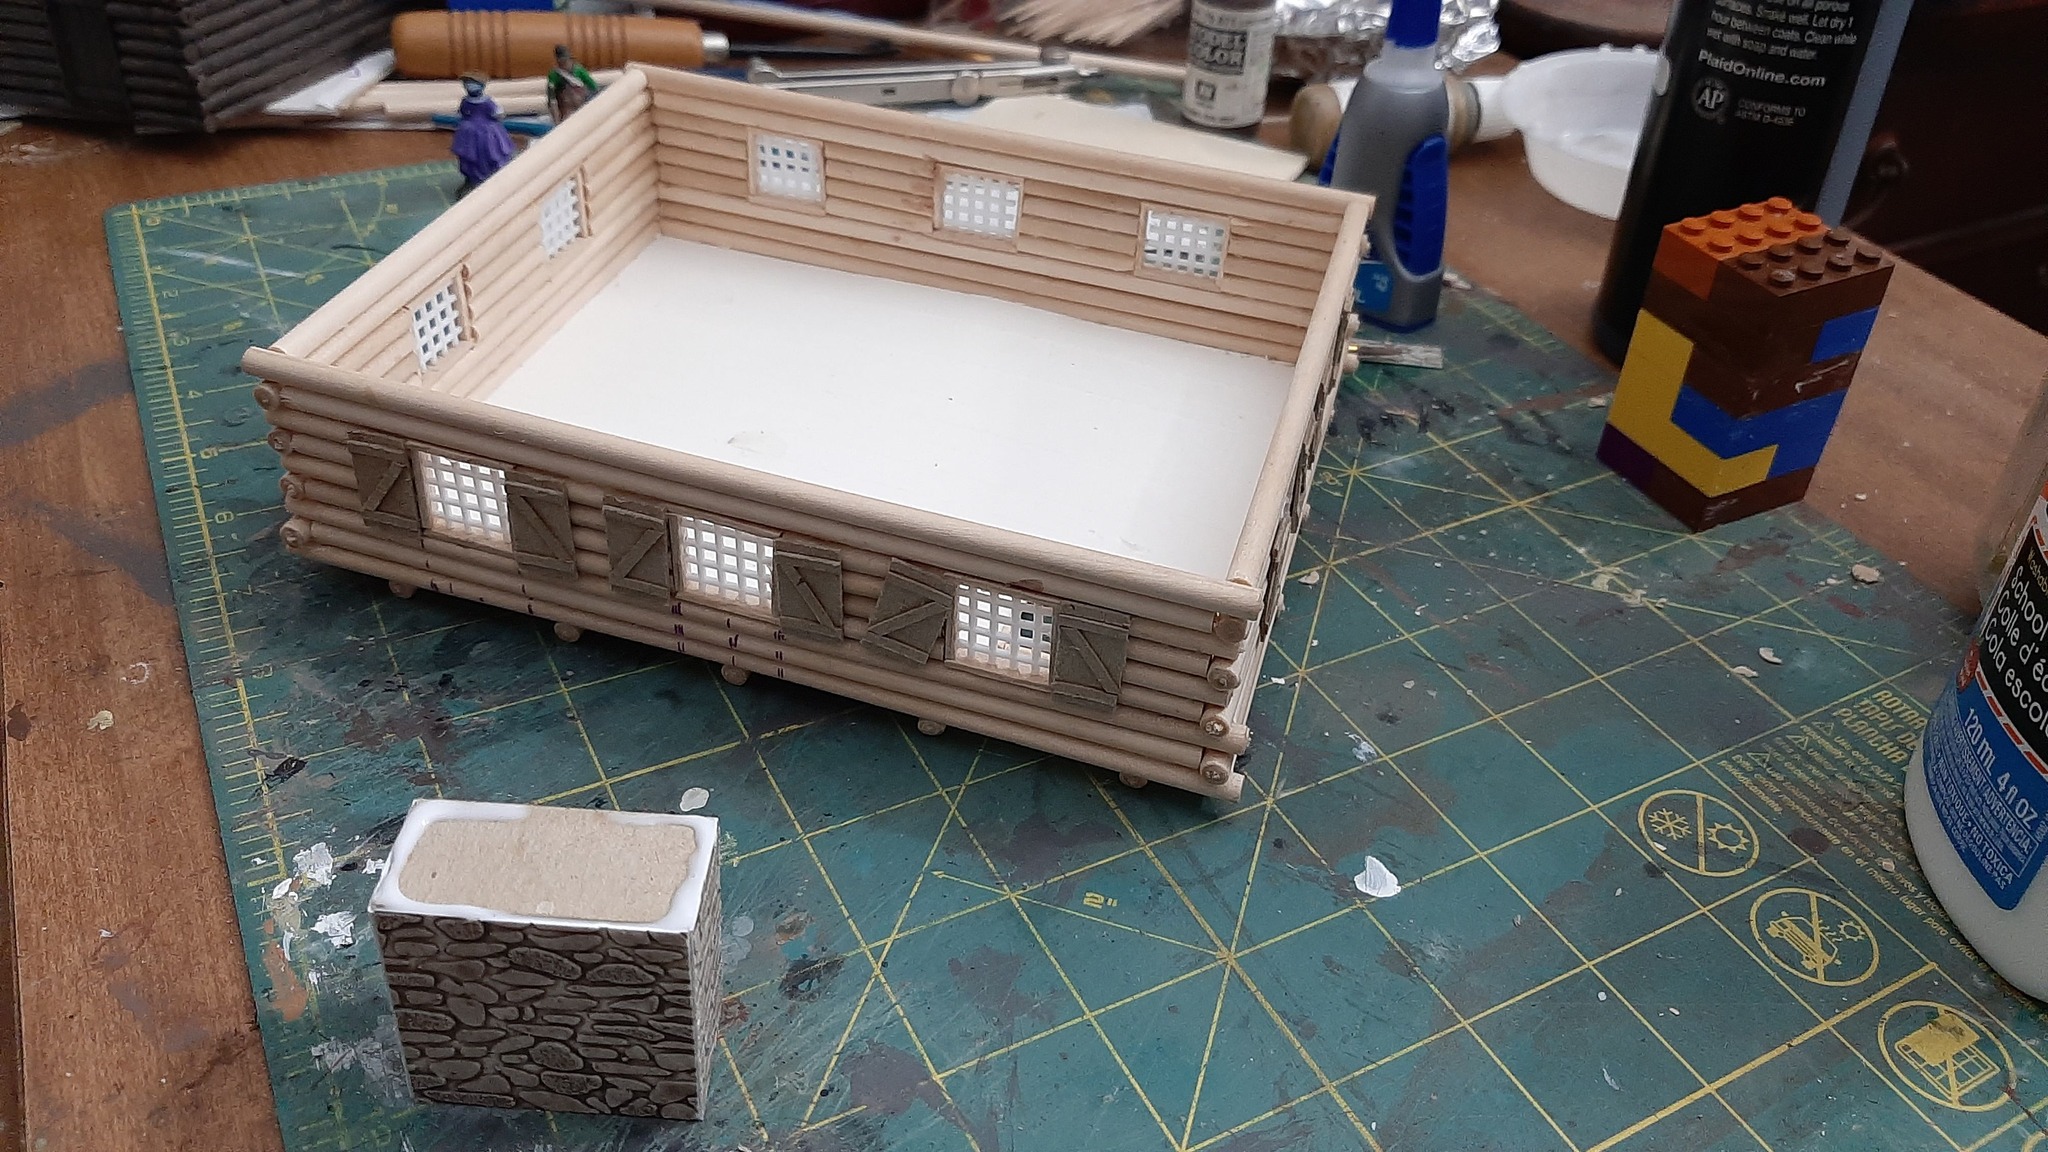
Based on photos I took there, I started building, tier by tier, with 1/4" dowels, cut to length as I went, to give a log construction look.  I was on a time crunch, so I didn't square off the dowels to get a perfect fit, but I still achieved the look I was going for.  I used a 28mm figure from Perry Miniatures Civilians pack to size the doors, windows, and ceiling heights.

First floor before stain and paint.

With the first floor finished, I stained the wood with a dark brown, then drybrushed with grey, trying to recreate the color of the Stillwater blockhouse.  I then moved onto the second floor.  Somewhere along the line I also decided to add a fireplace, made from card stock and stone patterned styrene.

First floor fireplace.

Patterned styrene was also used to represent the shingled roof.  With my deadline looming, this was the portion of the project that I rushed the most.  When all else fails, add more glue.

Second floor in progress.

Unfortunately, I missed the Christmas deadline for my recipient.  I did, however, finish the project in January and send it out to him.  Though the build was a bit tedious, adding courses one by one, I really like the look, and may build a second one for myself at some point.

Second floor complete.


Tuesday, September 15, 2020

Desiging A Model Kit


Ethan Allen House Model

Roughly ten years ago, long before I became a reenactor, I visited the Ethan Allen Homestead Museum in Burlington, Vermont. My goal was to tour the house and take some reference photos so that I could build a model of the building.

The Homestead was the last home of the American Revolutionary war hero (depending on who you talk to) and leader of the pre-war Green Mountain Boys who fought the rule of New York over what was then known as the New Hampshire Grants.

Allen had the house built after the War. Though he only lived there a few years, the house was passed on to his widow, and her new husband, after his death. Over the decades, the property was sold, changed, and somewhat lost to history. When the location of Allen's house was found again in modern times, it was restored to how it may have looked in its original condition. Today, the museum not only presents Allen's life on the Homestead, but also the history and culture of the Abenaki Indians who originally lived on the land.

My model project was an on again, off again affair. Mostly off. 10 years after my initial visit, I buckled down and set to work creating a model of the building. My final goal is to create a 28mm scale building that can be used for wargaming. Ideally, I'd like to create a kit that other gamers and modelers can build.


Carboard Test Parts

Assembling the First Floor
First Floor with Figures for Scale

When I had originally visited the building, a set of faded floorplans had been displayed on one of the walls of the Visitor's Center. I took photos of these plans, and used them, along with my reference photos, to create a rough model out of corrugated cardboard.

The cardboard model became a test of not only the size and shape of the building, but also how the various pieces of the model could be made to create a laser-cut wood kit for others.


Gable Ends and Roofs
Walls and Floors

Using my cardboard model, my photo references, and Inkscape, I created a layout plan of the various pieces and parts of the building. I decided to create the model using two pieces of thin stock for each wall. This allowed me to add laser-engraved detail to both the interior and exterior of the walls, and to create nice looking double-hung windows, as in the prototype building.

With the Inkscape drawings done, I sent the plan off to an online laser-cutting company. Then I waited.

Laser Cut Sheet

Several weeks later, a box finally appeared in my driveway. On opening it, I found my 10-year dream realized. I had a laser-cut kit of Ethan Allen's last home, designed by myself, and ready for assembly.


Second Floor Assembled
Interior and Exterior Walls
Kitchen Fireplace
Gable End
First Floor Assembled

Second Floor Assembled
Final Assembly Before Painting

While building the model, I found several areas that need improvement, mostly mistakes that I made in my Inkscape drawing. Whenever I encountered one of these issues, I'd make a note, correct the physical model, then move on. After a few days, I had a fully assembled and painted model.

Col. Allen Moves in Next to Capt. Smith

 The size matches the scale of the William Smith house that I built earlier. While the frames were a bit fiddly, the windows turned out just as I had hoped, adding a nice detail to a rather plain looking building. As reenctors, my daughter and I have since visited the Homestead several times over the years, and become friends with the folks who run the museum. My daughter was very happy to see that the layout matches the real house, including the upper floor, which we don't often see.


Kitchen Detail

First Floor Painted

Finished Model

 Overall, I think the project was a great success.  Having now done several reenacting events at the Homestead, it's neat to have a model of a house that we've "lived" in. While I need to make a lot of improvements if I ever want to put this into kit form for sale, I'm happy with my own personal model, and I look forward to designing more building kits.

Wednesday, August 12, 2020

Captain William Smith House

Neighbors visiting the Smith House.

When Stay-At-Home orders were issued back in March, I figured I'd use the time to work on a project.  I've been impressed with the offerings from Things From The Basement for some time, so I decided to order something for my AWI collection.  Their Captain William Smith House kit was perfect.

Kit parts.

The kit arrived quickly, and in great condition.  It was sent by Priority Mail by default.  While this did help with the shipping time, I would have been okay if there had been an option for slower shipping at a lower cost, but that option was not available from the website.  The only other minor issue is that instructions were not included in the kit.  They need to be downloaded from the website in PDF form.  I would have preferred a printed copy included with the kit itself, but this is a minor complaint.

First floor interior complete.

I found the instructions to be super clear and easy to follow.  I had the first floor assembled and painted on the first day.  Using photos of the inside of the actual house, I used wood stain on the floor, a flat white for the walls, and a colonial red for the doors and trim.

Assembling the windows.

The exterior walls go up.

The exterior woodwork and trim received the same treatment.  Stain for the exterior, white for the interior, and red for the windows.  Assembly was quick, and all of the parts were accurately cut and fit well.

Mrs. Smith checks out her new kitchen.

While I was building, the kitchen area seemed a bit bare, so I added a scratch-built fireplace and shelf.  While researching the actual house a while later, I found that I actually wasn't too far off on the fireplace placement.  The second floor and roof went together just as easily as the first floor and the walls.  I experimented a bit with painting the brick on the chimney, and was pleased with the result.  I wasn't sure about the weird white plaster bit on the front, as I thought it'd look, well, weird, but in the end I like how it came out, and it matches the original building.

The actual Smith House, Lincoln, Massachusetts

Overall, this was a great build, and I'm happy to have added it to my collection.  After building this, I'd highly recommend Things From The Basement products for anyone looking for buildings for their game table.