Showing posts with label Assembling. Show all posts

Monday, October 2, 2023

Building John Stone

I realized the other night that many of my friends don't know much about this little hobby of mine.  They've seen photos of painted minis, and maybe some AARs of games, but not much of the behind the scenes.  Below, I'll outline the steps for building one of these little figures that I'm so addicted to.

For the Pequot Indian War project, I've decided to use the scenario book from First Command Wargames, written specifically for the Song of Drums and Tomahawks ruleset.

The first scenario in the book represents the battle between the crew of John Stone, an English privateer, and a band of native Indians in 1634.  From my reading, this encounter seems to be the generally accepted start of the Pequot War.

Basically, John Stone and his crew were killed by natives.  There's some fuzziness about which tribe actually carried out the attack.  In fact, there's some fuzziness in who started the attack, Stone, or the Indians.  The fact, however, is that Stone was killed, and the English used that as a catalyst to attack the Pequot.

It didn't really start there though.

Apparently, in the early 1630s, the Pequots were on good trading terms with Dutch colonists around what is now called the Thames River in Connecticut.  Things went sour, however, when other local tribes also began trading with the Dutch.  Sometime around 1633, in a bid to gain back their trading power, a band of Pequot warriors killed some Narragansett Indians.  The Dutch, in response, took the Pequot Sachem, Tatobem, hostage.  The Pequot, to get their Sachem back, paid the demands of the Dutch, however the Dutch killed Tatobem, returning just his body to their trade partners.

Back to John Stone.  In 1634, John Stone, an English colonist/pirate from Massachusetts is killed, along with his crew.  Stone, to put it mildly, wasn't very well liked by the English.  In fact, he had been banished from their colony.  The English, though, seeing an opportunity, blame the Pequot for his death, though some sources think the killers may actually have been Niantic.  The English demand retribution from the Pequot, who state that, if the killers had been Pequot, the killing was revenge for the death of Tatobem.  The English point out that the Dutch killed Tatobem.  The Pequot say that they don't recognize the difference between the Dutch and the English.  And so, a series of back and forth revenge attacks starts.  The Pequot War.


To kick off my Pequot War project, I ordered a set of Warlord Games Pike & Shotte Infantry, designed for the Thirty Years War.  I also ordered a command sprue of four fancier figures, one figure on horseback, and some casualty figures.  These should give me everything I need for the campaign, though I'll probably have to do some customization.

The first figure I built is the hero/villian of Scenario 1, "Death of Stone."  John Stone's game stats show him to be carrying a matchlock musket, a pistol, and a sword.  Almost everything I needed was on the command sprue.

John Stone, in the Raw

In the upper left corner of the sprue was a suitable body in a dynamic pose, with a pistol arm, open arm, and sword.  The sprue also contained a number of floppy hats.  I'd have to do a bit of customization to have Stone carrying a musket and a pistol.

Parts removed from sprue. Body, left and right
arms, hat, and sword.  Base and musket arm from
my spare parts bin.


Step 1: Remove any mold lines or sprue bits

Steps 2 thru 4: Cut of molded base, glue to round
base, glue on sword.
 

Oops!  I grabbed the wrong arm!
There's a left, and a right.  Now I have a spare.


Steps 5 & 6 - Glue on hat and left arm.
All the standard bits are now in place.


With all the standard pieces from the command sprue in place, it was time to do a little customization.  As molded, the figures are set up to carry a single weapon.  Due to his stats, my version of John Stone needed to be carrying both a pistol and a matchlock.  With no suitable arms on the sprue, I went through my bits box and found an arm from a militia figure from the American Revolutionary War.  It's molded to be used on a figure with their musket propped against the shoulder of their left arm, but I could fix that.  Some people don't like plastic figures, preferring the heft of metal, but I really like plastic, exactly because it's easier to do things like this.

Steps 7 thru 9 - Customization.

First, the arm was cut from the musket.  The piece was a bit brittle, so it broke at the wrist of the musket, but that is what glue is for.  Next, the hand was carved away, leaving just the weapon.  Finally, the musket was glued into the open right hand of my John Stone figure.

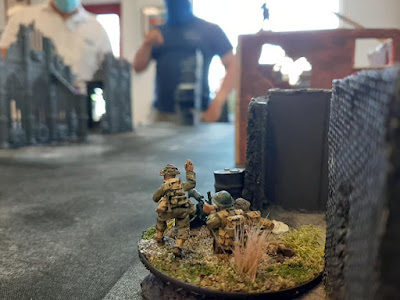
John Stone, fully assembled

Now, time to work on the rest of his crew.

Wednesday, April 13, 2022

Lighting the Cromwell


Back in August of 2020, I decided that my Cromwell-T for Konflikt `47 needed an upgrade.  Specifically, the Tesla cannon needed to be more Tesla.  I was happy with the paint, but I wondered how cool it would look if it actually lit up.

It was a little nerve-wracking to cut and drill an already painted model, but the end result was worth it.

Turret before conversion

Barrel removed
Barrel and base drilled to meet inside turret

New barrel constructed from flexible straw, styrene strips, and a LEGO plate

LED test fit

Flickering LED kit with switch and battery

New barrel painted


Wires fed through turret

Barrel glued, wires trimmed

Battery and switch added. These sit in the tank body.

Finished conversion with light off

Finished conversion with light on


Monday, November 29, 2021

Cromwell-T

After my wife purchased a BritishKonflikt `47 starter set for me, I settled in to assemble and paint. One of the first items that I tackled was the set's Cromwell tank.


British Cromwell - World War II Version

Assembly of the kit was strait-forward. The top went on the bottom, the treads were added, and the turret was popped on top. Being Weird War, the set actually came with two turrets. The standard, historical version, and the Konflikt Tesla version. For mine, I also added tank commanders in the hatches to add a little more life to the model.

If I've ever assembled any World War II armor before, it would have been 30+ years ago when I was a kid, though I don't recall building any before. Being my first, I browsed the world of the Internet for ideas on colors, markings, etc. I came across Pete the Wargamer's video on painting a Cromwell for Bolt Action.

Front View

Following this video, I gave the tank and turrets a primer coat of dark green. A lighter green was dry-brushed over the top, bringing out the various panels and greebly bits. I think I also added a bit of gray or silver for chipping and weathering. The treads were given a treatment of dark brown and black to muddy them up a bit.

Rear View

I can't recall where I found it now, but the marking were added based on some research into British World War II vehicle markings. A career military friend of mine mentioned that the Allied star was upside down, but based on my research, that's how the Brits painted it, if they painted it all. Many of their vehicles apparently were left bare.

K`47 Tesla Version

For the Tesla version of the turret, I did a quick search online for how others had painted things like laser weapons. I wanted sort of a lightening look, to match the fluff images in the Konflikt `47 rule book. If I remember correctly, I started with a watery dark blue, then a dry-brush of lighter blue, then some streaks of whitish blue to represent the light. Overall, I was happy with the results, and very happy that both turrets look completely at home on the tank body.

K`47 Tesla Version


Monday, November 22, 2021

Flashback: Konflikt `47

As I mentioned yesterday, I wasn't completely absent during the Pandemic of 2020-2021. In fact, 2020 saw me enter the world of Warlord Games Konflikt `47 game.

I'd been eyeing Konflikt `47 for a bit. The story line of the game is that, during World War II, a couple of space/time/something rifts open in the United States and Germany. Due to these rifts, Germany learn show to animate corpses, and some troops begin to change into things like werewolves. On the Allied side, technology jumps forward and bit, and armored walkers and Tesla-coil weapons start appearing on the field. The alternate history has the War continue past 1945, and into 1947.

Early in the summer of 2020, my wife innocently asked if I needed anything when she went into town for groceries. “A British Konflikt `47 starter set from the game store,” I joked.

To my surprise, she arrived home with said starter set.

The British are Coming!

Being in pandemic lock-down, there weren't going to be any games happening anytime soon, but I'd have plenty of painting time. Thus started my foray into the weird world of K`47.

Weird War Elements

I'll cover individual units in upcoming posts. For the short story, I painted up the box set, added some command and support units, and generally had a good time putting together an army. As summer went on, the world started opening up again, including the game space at our local game shop. There was a small group of regulars in the area who played K`47 weekly. On July 6th, I joined them for my first game.

----

Report of the action of 6 July, 1947.

Orders received at 16:21. Intelligence indicated the presence of a small strategic point just past enemy lines, roughly one city block from our position. With enemy infantry on the ground in the area, it was requested that we take their strategic point while simultaneously holding our own. A Bren gun team was stationed on our right flank at the axis of two main roads, providing cover along both open ways. A team of automatons was sent forward along the right to scout. On the left flank, a medium mortar team was set up. Their spotter, overlooking the city, was in radio communication from the top of a building near the machine gun team. A second team of automatons and one infantry squad were placed in the center.

Infantry, with Automaton backup, take up positions.

Sniper fire began instantly, targeting our infantry. A member of the mortar team spotted the muzzle flash, and a shell was immediately laid down on that position, destroying the threat. With our first pair of automatons clanking slowly up the right side, our infantry moved across the road to take cover along the walls of a ruined cathedral. The machine gun team was ordered into defensive position, keeping an eye on both roadways. Enemy infantry were spotted, just out of range, moving on our right and center. Infantry from our reserves arrived near a ruined farmhouse in the center of our line. Calls for armoured support went unanswered.

As enemy infantry approached carefully on our right, a second section of infantry rushed into the ruined cathedral, firing on our second automaton squad, which was destroyed. The first automaton section, firing into the building through the windows, caused casualties among the enemy riflemen. On our left flank, a Spinne Panzemech appeared in the distant rubble. Mortar fire was directed to its position, but no damage appeared to be caused. With the appearance of the Panzermech, our amoured division brought forward a Cromwell-T to support our men on the ground. A Guardian light mech was requested, but was not available. The newly arrived infantry took shelter in the ruins of the farmhouse in our center.

On our right, while our machine gun laid down defensive fire on approaching enemy troops, infantry from both sides traded fire. On the left, there were reports of Nachtjager in the area. An anti-tank team was also spotted, firing into the left quarter of the newly arrived Cromwell. Keeping an eye on the Spinne Panzermech, the Cromwell's crew moved their vehicle into cover next to a nearby building, aligning their turret to be able to fire at the enemy through broken windows. Another call was made to the Guardian, which was still not in the area. The platoon medic and myself arrived on scene, positioning ourselves near the farmhouse, just as an enemy Panther-X tank came into view up the street to the right. As the tank approached, our machine gun defensive position was eliminated.

Light Machine Gun team covers intersecting streets.
 
Heavy fire continued along our front. A couple of men in the farmhouse had been hit, but our medic was able to save one, a Private Orwell from Shropshire. Enemy infantry was beginning to come out of the rubble of the cathedral, but took immense fire from our boys. On the flanks, however, the fight had turned against us. The Panther tank, moving quickly up on our right, shredded our brave infantry who had sheltered against the cathedral wall. On our left, two Nachtjager did indeed appear, ripping apart the rear of the Cromwell-T before the crew had fired. Our forward observer, who had taken shelter in a building right across from the tank, sacrificed himself, calling down an artillery strike on his position, and the fowl flying beasts, keeping them from taking our location. Back on the right, a pack of Schreckwulfen attempted to jump our remaining automatons, but were eliminated by the team's machine gun fire. Distracted by the Schreckwulfen, however, the automatons fell to the enemy infantry still on our right.

Tesla armed Cromwell arrives for support.

 As our defensive line crumbled on both flanks, the requested light walker finally arrived. It traded shots with the Panzermech, but strategically blundering by placing its back to the Panther while taking cover behind a building. The Guardian was quickly eliminated by a shot to the rear.

With our forces nearly eliminated, we were required to retreat with the small remains of our infantry, leaving our strategic point in the hands of the enemy.

- 1st Lt. Nigel Teetotaler

Tuesday, October 13, 2020

Testing Lake Champlain


The Waters of Valcour Bay
 

Yesterday was the 244th anniversary of the Battle of Valcour Island, where Benedict Arnold led a small fleet of hastily built gunboats and ships against an also hastily built fleet of British vessels located on Lake Champlain between Vermont and New York.  While the battle ended in an American defeat, it also ended the 1776 campaign season for the British attempting to come down out of Canada to take Fort Ticonderoga and Mount Independence.

The anniversary reminded me of the Battle of Valcour Island game that I had been putting together last year.  In September, I build the American ship Enterprise.  I had so much fun with that build, that a couple of weeks later I assembled the HMS Inflexible.

Over the winter, I dabbled a bit with putting together the game.  War Artisan's Workshop has a great set of papercraft ships, covering the vessels that took part in the battle, as well as a free set of naval rules called Away Boarders!  My original intention was to build both the American and British Fleets, a game board, and some custom player sheets then play out the battle this year on or near the anniversary date.

Unfortunately, I didn't make much progress on this project.  I ordered a couple more ship kits, and started to assemble them, and played a bit with creating a board.  Away Boarders! uses a sort of grid system, with dots in triangular formations representing ship locations.  I wanted to create a board that both looked good, and was functional with the rules.  The above photo was the result of my one test.  A 2'x2' piece of hardboard was sprayed with a rattle can of greenish-blue texture paint that I had used on the bases of the two ships that I build.  I then used a white paint pen to add very small dots in the grid system used for the game.  Overall, I liked the look, however, that's all the progress I have.

With this project in mind again, maybe I'll add it to my winter project list and see about hosting a Valcour Island game on the 245th anniversary.

Tuesday, September 15, 2020

Desiging A Model Kit


Ethan Allen House Model

Roughly ten years ago, long before I became a reenactor, I visited the Ethan Allen Homestead Museum in Burlington, Vermont. My goal was to tour the house and take some reference photos so that I could build a model of the building.

The Homestead was the last home of the American Revolutionary war hero (depending on who you talk to) and leader of the pre-war Green Mountain Boys who fought the rule of New York over what was then known as the New Hampshire Grants.

Allen had the house built after the War. Though he only lived there a few years, the house was passed on to his widow, and her new husband, after his death. Over the decades, the property was sold, changed, and somewhat lost to history. When the location of Allen's house was found again in modern times, it was restored to how it may have looked in its original condition. Today, the museum not only presents Allen's life on the Homestead, but also the history and culture of the Abenaki Indians who originally lived on the land.

My model project was an on again, off again affair. Mostly off. 10 years after my initial visit, I buckled down and set to work creating a model of the building. My final goal is to create a 28mm scale building that can be used for wargaming. Ideally, I'd like to create a kit that other gamers and modelers can build.


Carboard Test Parts

Assembling the First Floor
First Floor with Figures for Scale

When I had originally visited the building, a set of faded floorplans had been displayed on one of the walls of the Visitor's Center. I took photos of these plans, and used them, along with my reference photos, to create a rough model out of corrugated cardboard.

The cardboard model became a test of not only the size and shape of the building, but also how the various pieces of the model could be made to create a laser-cut wood kit for others.


Gable Ends and Roofs
Walls and Floors

Using my cardboard model, my photo references, and Inkscape, I created a layout plan of the various pieces and parts of the building. I decided to create the model using two pieces of thin stock for each wall. This allowed me to add laser-engraved detail to both the interior and exterior of the walls, and to create nice looking double-hung windows, as in the prototype building.

With the Inkscape drawings done, I sent the plan off to an online laser-cutting company. Then I waited.

Laser Cut Sheet

Several weeks later, a box finally appeared in my driveway. On opening it, I found my 10-year dream realized. I had a laser-cut kit of Ethan Allen's last home, designed by myself, and ready for assembly.


Second Floor Assembled
Interior and Exterior Walls
Kitchen Fireplace
Gable End
First Floor Assembled

Second Floor Assembled
Final Assembly Before Painting

While building the model, I found several areas that need improvement, mostly mistakes that I made in my Inkscape drawing. Whenever I encountered one of these issues, I'd make a note, correct the physical model, then move on. After a few days, I had a fully assembled and painted model.

Col. Allen Moves in Next to Capt. Smith

 The size matches the scale of the William Smith house that I built earlier. While the frames were a bit fiddly, the windows turned out just as I had hoped, adding a nice detail to a rather plain looking building. As reenctors, my daughter and I have since visited the Homestead several times over the years, and become friends with the folks who run the museum. My daughter was very happy to see that the layout matches the real house, including the upper floor, which we don't often see.


Kitchen Detail

First Floor Painted

Finished Model

 Overall, I think the project was a great success.  Having now done several reenacting events at the Homestead, it's neat to have a model of a house that we've "lived" in. While I need to make a lot of improvements if I ever want to put this into kit form for sale, I'm happy with my own personal model, and I look forward to designing more building kits.