
INVASION IMMINENT. It was
all over the news. The bugs were coming. Holo-tickers scrolled
across the tops of buildings, warning of evacuation. The AI news
reporters had been talking about it for days.
Most of those
who could afford to had already paid for off-planet extraction.
Those who couldn't pay hoped to find their way to government escape
ships. For some, this, like any crisis, was a time for money to be
made.
Stepping into an alley shanty town, Molly ducked into
the small tin and wood shelter she and her friends called home. Not
everyone in Duplantier had money. She saw Christina crouched on the
ground, siphoning water through a small purifier. Selling clean
water was what had been keeping them fed the last few weeks. Molly
tucked the heavy carpet they used for a door to one side, hefting it
up over a board to keep it in place. Christina looked up, her eyes
squinting at the sunlight.
“I found us a job,” she said,
“It's not much, but it might help us get out of here.”
“What kind of job?”
Molly asked.
“Nothing much. There's a hanger over near the
spaceport. They're loading up small shuttles and such to supply the
larger ships. Responsive Acquisitions wants someone to grab a
package from there before everything gets launched.”
A package. For
Acquisitions. Best not to ask.
Molly raised an eyebrow, “Is
Chloe back?”
Christina brushed a lock
of pinkish brown hair out of her yes, “She's out trying to sell
that stuff she found the other day.”
Molly nodded, “Well,
I'll pack up what little we have.” She thought of the bugs
invading, reflecting on the stories her father had told her as a kid.
“We do the job tonight?”
“Yeah. Then we see if we can
get outta here.”
*****
Thus begins my first Five Parsecs From Home campaign. Five Parsecs is a solo
storytelling/miniatures game from Modiphius Entertainment which pits
a star ship crew against a number of enemies and situations. Much of
the game is table and dice driven, with a lot of random elements used
to create characters and situations. This randomness acts as a
prompt for the storytelling aspect of the game. The miniature
portion is used to resolve any battles that may come up.
At
its most basic, the game consists of pre-campaign setup, which
includes character creation, then a number of campaign turns that are
split into three phases: Pre-battle, battle, and post-battle. I've
opted to play a 20 turn campaign.
For my game, I'm using both
the core rules, and those from the Five Parsecs Compendium, which
adds a number of variants to the base game.
For my first
campaign, I've opted to use the following options from the
Compendium:
- Starting in the Gutter
- Psionics
- Dramatic Combat
- Factions
- Expanded Missions and Quests
- Expanded Connections and Factions
- Casualties and Injuries
- Fringe World Strife
- Loans
I'll go into each of these as they come up.
To begin a campaign, players first need to create a Crew. The standard number of characters in a crew is six, but, because I'm using the Starting in the Gutter option, I'll be starting with a crew of three. There are a few ways to create characters, but the most interesting is to use dice and the rule book tables to generate each character's attributes. Statistics are based on the character's race, attributes, background, and motivation, all of which can be randomly generated.
For my crew, I generated three human characters.
Being a sci-fi game, alien races are common, but humans are the most
common. After generating the characters, I generated their starting
weapons and equipment. Due to Starting in The Gutter, none of my
characters could have military grade items, and started with fewer
items than a standard crew. They also begin with no money and
without a starship of their own, so they are planet bound at the
beginning. Thus, the crew is starting off poor, with hopes of one
day earning enough money for their own ship.
 |
| Molly's Marauders |
Here are the characters that I generated, along with the the back stories that I imagined for them.

Species: Human
Background: Military Brat
Motivation: Political
Class: Ganger
Experience: 0
Reactions: 2 (Human + Ganger)
Speed: 4" (Human)
Combat: +1 (Military Brat)
Toughness: 3 (Human)
Savvy: +0 (Human)
Luck: 1 (Leader)
Hand Gun (Dramatic Weapons Rules)
Range: 9"
Shots: 1
Damage: 0
Traits: Pistol (+1 Brawl, +1 Combat within 6")
Molly White, captain of “Molly's Marauders,” was born into a military family on Sarail III. She spent her childhood moving from duty station to duty station with her father, who raised her on tales of his military incursions on distant planets. As a teen, she was stranded on Fuller III when her father was killed during a hover-car accident there. She began living on the streets, with an eye on the government, who, despite her father's contributions to Unity, gave no help to a military orphan.

Species: Human
Background: Tech Guild
Motivation: Discovery
Class: Enforcer
Experience: 0
Reactions: 1 (Human)
Speed: 4" (Human)
Combat: +1 (Enforcer)
Toughness: 3 (Human)
Savvy: +2 (Tech Guild + Discovery)
Luck: 0 (Human)
Hand Gun (Dramatic Weapons Rules)
Range: 9"
Shots: 1
Damage: 0
Traits: Pistol (+1 Brawl, +1 Combat within 6")
Twenty-five year-old Christina Navarro has always been a techie. As a child, her intense curiosity led her disassemble a number of her parent's electronics, as well as wreaking havoc on a few of their smart home's features as she tried to discover how they all worked. Later in life, she began attending university, but soon found herself with a fringe crowd of students selling black-market technology. This led her to being kicked out of both university, and her parent's home. While living on the street, she and her friend Chloe met Molly White. The trio became fast friends, and formed a small family for the sake of street survival.
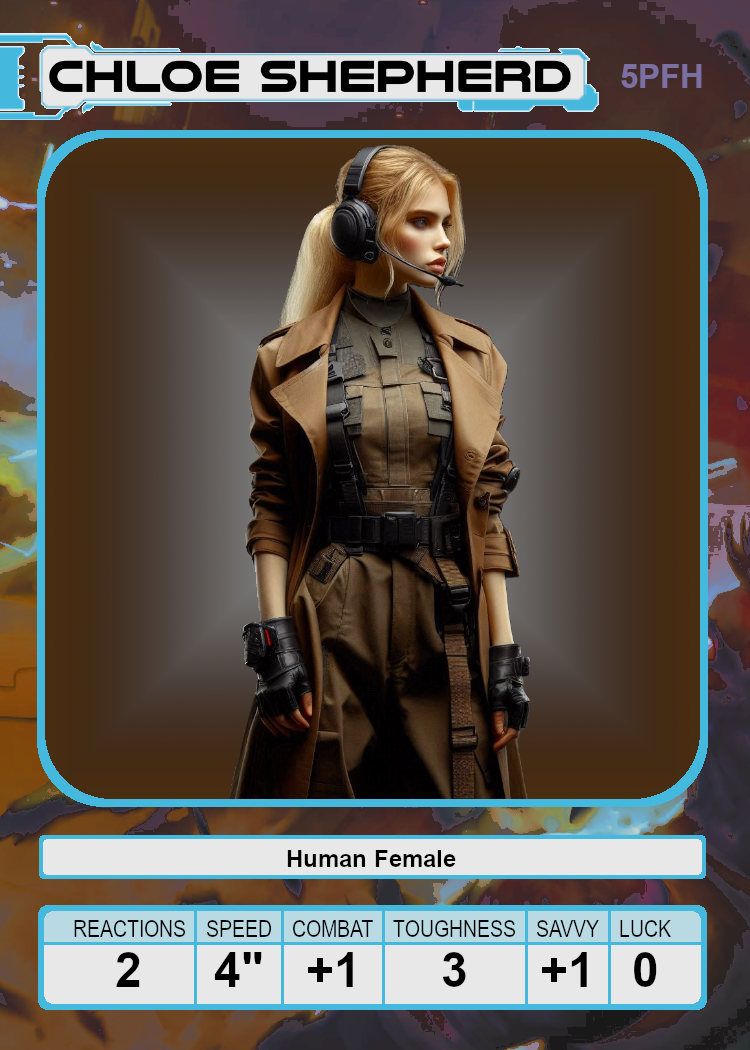
Species: Human
Background: Wasteland Nomad
Motivation: Discovery
Class: Enforcer
Experience: 0
Reactions: 2 (Human + Wasteland Nomad)
Speed: 4" (Human)
Combat: +1 (Enforcer)
Toughness: 3 (Human)
Savvy: +1 (Discovery)
Luck: 0 (Human)
Scrap Pistol (Dramatic Weapons Rules)
Range: 7"
Shots: 1
Damage: 0
Traits: Pistol (+1 Brawl, +1 Combat within 6")
Born in the western desert
of the northern continent on Fuller III, Chloe Shepherd made her way
to the space port of Duplantier's
Place when her nomadic family passed by on their way to their winter
hunting grounds. Chloe's interest in the bright lights, whizzing
hover-cars, and bustling city was intense enough to cause her to stay
after her tribe had moved on after stocking up on supplies. Jobless,
Chloe soon fell in with the street merchants, acting as a guard for
various suppliers. It was here that she met Christina Navarro, who
was selling technology to a local buyer.
After creating
characters, the next step to beginning a campaign is to determine the
group's weapons and gear, as a whole, then assign that equipment to
each character. In some cases, that equipment is kept on the crew's
ship, or, in my case, in the group's hovel. In addition to what each
character is carrying, I rolled for the following items: Scrap Pistol
(x2); Purifier (+1
Credit per turn); Fake ID (+1 to obtain a license); Beam Light (+3
Visibility in low light)
After creating a crew
(and, usually, a ship), the next step in a Five Parsecs From Home
game is to begin Turn 1. To begin the turn, it is first determined
if the crew is going to travel to a new planet. In my case, the crew
has no ship, so they will not be traveling. I do, however, still
need to create the planet that they are on.
Using the dice and
tables for planet creation, the planet of Fuller III was born.
 |
| Fuller III |
For
each planet that a crew travels to, it must be determined if they
need a license to operate as hired contractors for jobs. In the case
of Fuller III, licensing is required, but my crew has a Fake ID,
which allowed them to forge a license. Nicely, this random roll on
the equipment able fit nicely with my already constructed
story.
Also when a crew visits a new planet, it must be
determined if they have any Patrons (people who will pay them to do
jobs) or Rivals (people who are enemies of the crew). In my case,
the crew received one Patron during character creation, and no
rivals, as this is the first campaign turn. I've opted to call their
patron Suzuki Kansuki, a wealthy individual who is willing to pay
handsomely when work needs to be one.
Using the Compendium's optional rules, planets may also have factions vying for the crew's attentions. In the case of Fuller III, three factions were randomly rolled: a Criminal Enterprise, a Political Movement, and an Advocacy Group.

With the planet created, it's time to start playing the first phase of the turn. First, the crew must pay 1 Credit for upkeep (things like food, clothing, and general goods). While my crew has no money to start with, they were able to avoid debt by having a Purifier, which generates 1 Credit per campaign turn. So, we don't go into debt, but there's still no money to buy goods or a ship.
Next, each character is assigned a task. In my crew's case, one character went out to look for work, one went recruiting for more crew members, and one went to trade items. In my story, Christina Navarro was able to find a second Patron, which allowed me to choose between two different jobs that were offered to the crew. With a Criminal Enterprise as a planet faction, and “Secretive Group” rolled for the second Patron, I opted to create a sort of underground buyer, called “Responsive Acquisitions.” After rolling up the random jobs offered by each Patron, I decided to have the group work for the acquisition company. The pay isn't as good, but the danger is less, and, with an invasion coming, less danger seemed like a good idea.
With a job determined, Molly went out to find a new crew member. Because I am starting with less than six characters, adding a new member is free. I created Darwishi Kassis, who will show up in the next phase.

Species: Human
Background: Unknown
Motivation: Unknown
Class: Unknown
Experience: 0
Reactions: 1 (Human)
Speed: 4" (Human)
Combat: +0 (Human)
Toughness: 3 (Human)
Savvy: +0 (Human)
Luck: 0 (Human)
Hand Gun (Dramatic Weapons Rules)
Range: 9"
Shots: 1
Damage: 0
Traits: Pistol (+1 Brawl, +1 Combat within 6")
Finally,
my third character, Chloe, went trading. Trading represents the
character bartering for and selling small items, which, in Turn 1,
resulted in the crew earning 2 Credits. Good news! We're poor, but
not completely broke.
Phase two of the turn is the miniatures
phase, where the crew will do the job assigned to them. I've been
working on acquiring miniatures, getting them painted up, and
building terrain. Once all of that is complete, I'll be able to play
out the next section of the story.

.jpg)


